
This tutorial covers how to setup an embossed business card properly in illustrator for print.
The very first thing you need to do is create our art board. In this case, we are embossing a business card, so our art board is 3.5" x 2" plus an 1/8" for bleed. Make sure your raster effects resolution is set to at least 300dpi and the color mode is in CMYK. Once your file has opened, we are ready to start laying out our artwork.
A good second step is to save our file. Make sure you save your illustrator file so you don’t loose your work. Always good to save your work as often as possible, to ensure you’ve always got an up to date version on hand in case of computer problems.
Now you are ready to start setting up your artwork. You can lay out the front of your business card however you like. We already had some artwork created, so we dropped it into the design. You would setup the card as you normally would for any other business card.

Once we’ve got the front side laid out we need to indicate what is going to be embossed. Anything we want embossed needs to be on a separate layer and set to 100% black ink. With our design, the section we want embossed is our Clubcard Peace character in the center of the card. So what we did was create an exact copy of the character and set it to 100% black ink. Here you can see where the embossing will go.
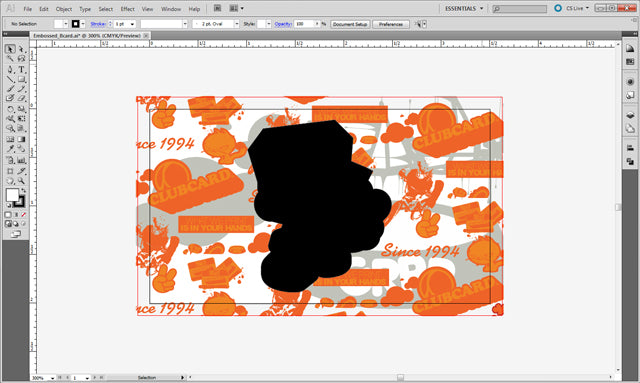
Now we need to take this and create a separate layer for it. Click the new layer button in your layer window and copy and paste that element into the new layer. Now you can see the front artwork and embossed artwork are on their own layers.

Now that we have the front setup, we'll bring in the artwork for the back of the card. Looking at the back of the card, you want to keep in mind that whatever is on the back will also be effected by the embossing. What ever is embossed on the front, will be debossed on the back. When your looking at the front of the card, the embossing is pushing parts of the card up, and when looking at the backside it would be pushing the card down. Something to keep in mind is that backside will be mirrored, so you will want to flip the image when setting up the file. You want to make sure that you’ve kept all important graphics and text a safe distance away from the embossed area.

Now we want to save our files for print. You go up to the File menu, select save as, and save as a PDF. We need to export each layer individually and label them correctly. For the front file we will hide all the other layers and export a PDF with only the elements meant to print on the front. We will name the front CMYK layers Front_CMYK.pdf and it will look like this:

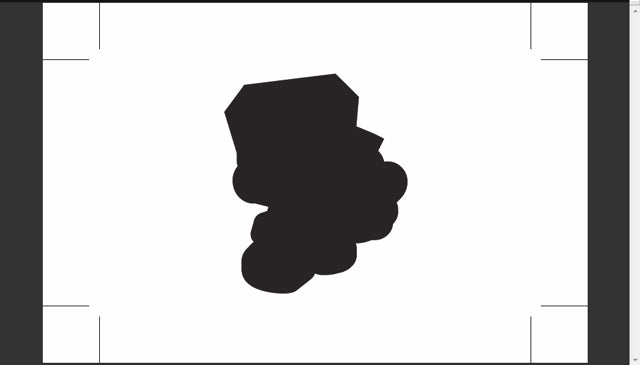
For the embossing layer, we will show only the layers for embossing. The embossing needs to be sent as 100% black, so make sure nothing else is on that layer before you export. That layer will look like this:
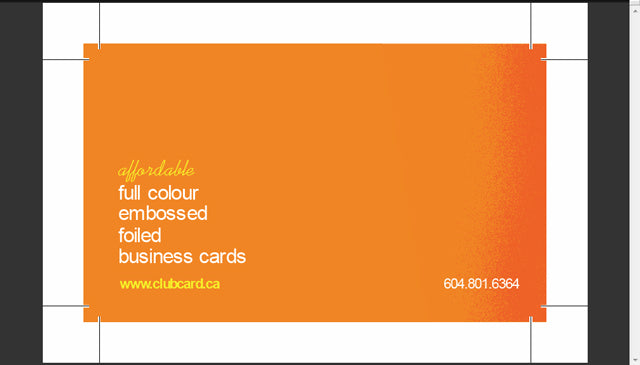
The back side is full colour and will be named Back_CMYK.pdf. It will look like this:
And their you go, we’ve got our files all setup for embossing and ready to send for print. We hope this video has been helpful.
If you are ready to print your cards now, you can order Embossed Business Cards from our Canada Shop or United States Shop, and be sure to Like us on Facebook !